
With Philips 3200 Series Fully Automatic Espresso Machine discover the perfect balance of convenience and quality while enjoying the delicious taste and aroma of coffee from fresh beans at home with the perfect temperature, thanks to our intelligent brewing system. Featuring a built-in ceramic grinder, the Philips 3200 Series ensures precise and consistent grinding for optimal flavor extraction. Whether you prefer a strong espresso or a creamy cappuccino, you can personalize your coffee with just a touch thanks to the intuitive touch display. Choose from various coffee options including espresso, coffee, americano, hot water for tea or milk options like cappuccino or latte machiato with ease thanks to our LatteGo Milk System. Cleaning and maintenance is effortless with Philips 3200 Series thanks to the removable brew group allows you to clean it thoroughly just by rinsing it under the tap and the AquaClean water filter ensures up to 5,000 cups without descaling.

Super-Automatic Espresso Machines
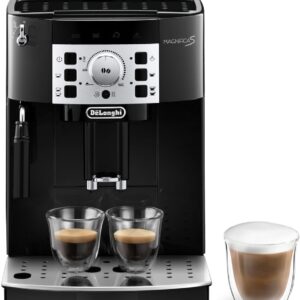
PHILIPS 3200 Series Fully Automatic Espresso Machine – LatteGo Milk System, 5 Coffee Varieties, Intuitive Touch Display, 100% Ceramic Grinder, AquaClean Filter, Black (EP3241/54)
$4.00
| Asin | B07VFY4MXM |
|---|---|
| Dimensions | 10"D x 17"W x 15"H |
| Weight | 21.1 pounds |
| Manufacturer | Philips Kitchen Appliances |
Chris R –
Came from a Nespresso Vertuo machine to this. I like that I can make various coffee drinks. I mostly make regular coffee but have the option of a capuccino when I want it. Great Prime Day deal last October. Some things to note:
1. Is it loud? Yes it makes noise. It grinds coffee beans and all, but it doesn’t run very long, so it becomes “normal” after a few times.
2. Does it use water? Yeah, some people mention it uses a lot and leaves a lot in the drip tray. If you are making anything that uses the Lattego milk function, it will use more water as it uses steam (that comes from water) to froth up the milk. The extra water is a by-product of the steam. When I make regular coffee there is very little water in the tray. Still wish the water capacity was bigger. I find myself drinking more coffee now cause I like the coffee I get from the machine.
3. Is it hot enough? Yeah….when it exits the machine it is around 196 degrees. I placed a thermometer in the coffee stream coming out of the machine (at the highest temp setting). The National Coffee Association recommends 195-205 degrees as the Optimal temp for extraction. Going straight into a cooler vessel (mug/glass whatever) it won’t stay hot forever, plus it won’t make like 12 oz cups like a K-Cup machine does, so it will cool faster. I like to add half and half to my coffee. With this machine I learned to heat my half and half in the microwave before it brews into the cup. Not really a pain just something different I am used to. Still wish it went to 205 degrees, just a little extra would be great.
4. I use the coffee function and use the top settings for water amount and get the right size for my mug. I run it twice for a travel mug.
5. It makes a pretty decent coffee, strong enough. I left it at the grind setting it came with. I remember when I tried the coffee at a Williams Sonoma store, I asked the demo person what setting they had it at, and the sample coffee was good.
6. Keep the drip tray and grounds catcher container empty. I let the grounds stack up and the machine wouldn’t brew. My fault. Just empty and continue. I cancelled a brew mid stream when I realized the grinder was making a different sound (out of beans, my fault). It wouldn’t do anything after I paused, so I unplugged it and plugged it back in and it was fine.
7. Clean the unit as described in the manual or watch the Philips video on YouTube. Nothing crazy hard, just let it dry for the rest of the day. I find the sliding channels for the water container build up some coffee grounds, I just wipe it down with a damp paper towel. I did one descale recently, again, follow the directions and it’s fine. Also ran one of the oil remover tablets as well. These machines cost money so take care of it.
8. Break in period, follow it. I admit it was a bit more than I would have liked. Bought some cheap beans to run through the break in. A bit of a negative.
9. Enjoy exploring the choice of whole bean coffee out there. I’m finally settling into a few that I can find easily and close by.
10. I like to add flavored syrups etc to the milk in the container before I brew. Really mixes the flavor in well. And easy hot water rinse for the milk container afterwards. Careful removing the clear container from the base, I broke mine the first time, as I didn’t push the tab down to remove the clear container.
11. Machine looks nice in the kitchen. If you want the extra Wow go for one of the models with the LCD screen.
Overall a good machine that requires a learning curve. It may be too much for some to want to learn or bother with the cleaning, break in period etc. But if you want a coffee adventure this machine will provide it. No complaints, no issues for me.
Art J –
At 16 months, unit continues to work dependably again I would say 90% of time. Other 10% implies give it a cleaning and its back in action. Based on another solid month of good service raising from 3 star to 4 star for dependability and use. Coffee taste was always a 4 star review.
While the Latte-Go does froth milk decently, we have switched to using this for our milk froth and reserve the Philips to making espresso’s and coffee only. The device shown below really takes frothing to another Starbucks like level and its much less finicky than using the Philips. See my review on this product below. Been using this now for like 7 months. Between these 2 machines very happy with our coffee drinks now.
Maestri House Milk Frother, Variable Temp and Froth Thickness Frother and Steamer, 21OZ/600ML Smart Touch Control Milk Warmer, Dishwasher Safe, Memory Function for Latte Cappuccino, Hot Chocolate
Stripping out some older review content due to space allowances…….
————————–
14 month update. What a difference a month makes! At 13 I was completely ready to write this machine off. I was exhausted with its constant maintenance and cleaning needs and very iffy results that it would work properly even after that time consuming maintenance. It was 50/50 at best that the machine might work properly. For this entire 14th month, I would say 90% of the time this machine works without any issue. The rest of the time, some basic normal cleaning and light greasing of the o-rings corrects whatever the issue is and it’s off and working again. The only thing I can think of timing wise which fits into this complete turn around in the machines behavior is that I completely disassembled the brew group to its entirety (watch you tube video), deep cleaned and scrubbed each piece and then regreased brew group and o-rings with a new grade of of safe silicone grease (Haynes Silicone Grease, Food Grade Sanitary Lubricant). I was using the Philips brand grease previously. Since then coffee making is a bliss again. I still don’t really believe the turn around, but seeing is believing! Raising my total review back to 3 stars based on latest performance. I need some further protracted good performance history for upgrading its score beyond this. We will see. Leaving earlier review(s) down below for contrast and explanation of previous issues and reviews.
———
This is my 13 month product review of the Philips EP3241 Latte Go automatic coffee maker.
Below all the plus signs down below is my original 1 year review. Between there and here is my 13 month update. Also had to trim some of my previous 1 year review text to fit the 20,000 char posting limit…
Taste of coffee from this maker still rates a 4 star review. When the machine *works* its makes a very good cup of joe. The bad new is that it doesn’t always work. In fact, it seems to be taking an increasing amount of work from me to keep this beast going. I like to putz with stuff *to a degree* but I don’t think most buyers will be appreciative of the effort that this thing takes to keep the caffeine fix going. Dropping my overall review from 3 stars to 2 stars because of never ending and increasing maintenance/cleaning overhead. I’ve had the brew group get stuck in the unit twice in this past month. Fixing required another YouTube video search (search for “stuck brew group”) and some significant disassembly to not force break removing the brew group from that stuck position. Its not terribly difficult to do once you learn this latest trick and nothing was broke or broken in the fixing process but its a pain, that simple. Shouldn’t have to put this much effort into getting a cup of coffee every day. In good conscience, I can no longer recommend this unit from an overall operational standpoint. It’s good coffee that hasn’t changed – but the cost in labor is getting to be really irritating. Worst of all I have to admit that my wife’s assessment of this expensive purchase is turning out to be correct, “its a bit of a lemon”. So swallowing a bit of crow along with my joe….not fun, and it was almost $800 bucks
+++++++++++++++++++++++++++++++++++++++++++++++++++++++++++++++++++++++++++++++
This is my first “fully automatic*” coffee machine, all of my other coffee making methods previous to this machine consisted of the following: Stove top and electric peculators, instant coffee, coffee presses, drip coffee makers (very low end to very high end in price), poured over coffee making processes. I have many great memories of really good cups of coffee from all of these methods, but in terms of day in and day out coffee making and consistently getting a really good cup of coffee, I really like this Latte Go machine. The other methods were much more touch and go and fleeting in those really good cups of coffee, this machine is pretty much all of the time.
So my grade of this coffee maker in terms of consistently producing a very good cup of coffee is like 4 out 5 stars – in my stage of present coffee snobbery. I think my wife would agree with this grade which regards the aspect of “taste” in this review. I am sure there are better coffee makers out there, like anything there always is, but I’m sure pricing on those machines which might yield those 5 stars is completely outrageous – the cost of this machine was close enough to that for me. I’m very happy with the purchase from this point of view, it makes really good coffee in my opinion.
What most of this review will be about though, is where I’m not quite so happy with this machine, with that being its daily maintenance. This is what drives my final product grade down from a 4 to a 3. For this machine to be “fully automatic” it does require a considerable amount of daily “manual” intervention, i.e. cleaning, so one could really argue the fully automatic selling feature of this machine. When it works, it works great, when it doesn’t it just needs cleaning – its just really that simple with this machine. This aspect of this specific machine is where I think many people may find this purchase potentially off putting. If you don’t have an issue with being hands on with this machine from a daily cleaning perspective to get that great cup of coffee, then you will be okay. If you can’t or don’t have the desire for that sort of commitment and willingness to experience this “pain in the butt” factor, then I don’t think then that this machine would be for you. This isn’t your drip coffee maker which your probably used to. My experience with this machine is that it absolutely needs almost daily fussing with in the cleaning department for it to work properly. I am typically willing to make that expenditure in time and effort to achieve that great cup of coffee from this machine. I will be absolutely honest here though, there have been mornings where I have really wanted to punt this machine to the curb. Its at times very frustrating, especially in the early morning when all you want is that first cup of wonderful coffee to drink and to fully wake up, only to find that this machine is having another one of its hiccups…
I will bring something up at this point which may be a large influencing factor with my direct experiences with this machine. We make and drink a lot of coffee every day in our house. I drink the non-milk based drinks from this machine, the Americano’s and the regular coffees. My wife drinks the frothed drinks from this machine, the Lattes mostly and sometimes the Cappuccino’s. I probably use the machine a minimum of 7 times a day for my drinks, all of which are doubles, and my wife a minimum of 5 drinks a day. These are minimums, so we use our machine a great deal each day. This may greatly influence the degree of issues and problems we experience and which then revolve around the cleaning aspect of this machine, so please keep this in mind as you read.
Cleaning, my reality with the machine. There are basically 2 issues I which I experience with this machine.
1) More water going into the drip tray vs the actual coffee drink, than what is desired and normal. This is by far the worst issue with this machine.
2) Milk frothing of the machine not working properly.
These 2 items above constitute 99.9% of my issues with this machine. Item #1 is fixed by cleaning. Item #2 is fixed by cleaning/using different milk/and messing with the heat settings of the machine.
Fixing Issue #1. More water going into drip tray vs the coffee drink than what is desired and normal.
Remove the brew group and give it a thorough rinse out in the sink. Wipe out where the brew group sits within the machine with paper toweling to get rid of any grounds and general gunk buildup. My tip here is to use a flashlight (I use a very nerdy led headlamp but excellent for this purpose) and to peer into the cavity where the brew group sits and look for gunk that way. You will be amazed and possibly grossed out by how much gunk collects within that cavity in all of the nooks and crannies. Its black plastic (by design I’m guessing) and very dark in there, so without the light your going to overlook a bunch of gunk. So use the light and give it a good cleaning. It will help resolve issues and improve coffee taste. When I rinse the brew group, I fill the sink with hot soapy water and let the brew group soak in it for a while. After that sitting period , I then agitate the brew group in the water by hand. I like this because it does a general deep cleaning of the brew group and does a good job of removing oils. I have found that just performing general under the faucet rinse outs to be less effective. One mistake I was consistently making, which may have aggravated some of my issues with this machine, is over lubricating it. I was touching up the lubrication of the brew group almost every time I rinsed the brew group out. Your only supposed to do the greasing about every 500 cups, in general. That period of times seems a bit long to me, so I would just say lubricate it when you think it really needs it – bad squeaking noises, the brew group visibly moving a bit hard as you manually exercise it through its full range of motion when you have it removed from the unit for its rinse out, etc. The point is that I was overdoing it. It doesn’t need to be anywhere near the frequency I was performing it at. Possibly because I was over greasing, I at one point had to completely dissemble the brew group because it had reached a point where it was just so gunked up by grease, fine grounds and the combined mixture produced by those two items, where the unit was still moving hard even though I had just performed my deep rinse process on it. Grease and finely ground coffee dust creates a thick sludgy gunky mess in the brew group. No matter how often I rinsed the brew unit out, I was just getting tons of water in the drip tray vs the actual drink. So I found some videos on YouTube which demonstrated a complete disassembly of the brew group unit, just search brew group disassembly for those videos. I disassembled my unit, with the confidence gained from watching those videos, and then gave my brew group a super thorough clean out with a stiff nylon dish brush and a long soaking in a sink filled with hot water and Dawn dish-washing soap. I then re-assembled it after lightly re-greasing the moving parts again. This resolved the issue of over greasing and just having that constant amount of water bypassing the drinks and going into the drip tray. I had to do this once in my 12 months of use about 7 months into my ownership, again most likely self induced rather than a defect in the unit. A bit scary to do as a new replacement brew group is like $80 after just having plunked down $700-$800 for this purchase of this coffee maker in the first place, but totally doable after watching those disassembly several videos from several sources as reference. You will need a Torxs #10 bit, and a small flat bladed screwdriver to act as as pry bar, and a good shot of whiskey for resolve :). Don’t use power tools. The brew group screws, those screw directly into soft plastic and you will strip them out if you don’t tighten the screws by hand and use a gun or something like that. After having done it once, I would call this process no big deal, just time consuming. I could see myself having to perform this process again even despite cutting back o my re-greasing of the brew group. I am hi-lighting this mistake on my part to bring attention to the fact that you can take apart the brew group and recondition it if the need arises. You don’t need to spend $80.
Another thing which I just “very recently” ran across in my almost daily battle of too much water into the drip tray is something you want to pay attention to as it greatly reduces the severity and frequency of that irritating issue. If you look at my second attached photo you will see a picture of the water outlet valve which sits inside the cavity where the brew group slides into. Those 2 red O-rings on that water outlet valve, keep a **light** film of grease on those rings (all red O-rings which you see in the unit for that matter). Greasing those O-rings creates a much stronger and easier seal in my unit, which does not dry out over night. Hence I have much less occurrence of water bypassing the drink and ending up in the drip tray. I think this is my top tip to remember! Perform the light greasing of those rings with your finger tip is my suggestion.
This leads me to resolving issue number #2. Issues with milk frothing. You will know when you have this problem when you see large air bubbles in your milk froth instead of tiny little ones. The large air bubbles result in less loft and volume of the milk froth and result in flat tasting drinks. It will be very apparent when you experience this issue. The vast majority of the time the solution to this issue is the
cleanliness of the Latte-go cup. There is a milk channel in this cup located in the area of the cup where it hooks into the machine where steam comes out and where it ends, where the frothed milk eventually comes out of the cup when you use it. This channel will get clogged with dried up milk enzymes. This occurs when you let milk sit in the Latte-go cup or store milk in the Latte-go cup in the fridge and don’t empty it out and rinse it out quickly under the sink after each use. To fix it, same as the brew group. Fill the sink with hot soapy water and let the cup soak. Agitate the cup by hand in the water after it has soaked and things have softened up. If that doesn’t correct the issue, I resort to making a fake Latte in the machine. Use water in the Latte-go cup instead of milk. Set the machine to use coffee grounds instead of beans, and don’t put any ground coffee into the ground coffee receptacle. Your fooling the machine to make a Latte without any milk or coffee. You just want the water and steam to pass through the Latte-go cup to dislodge those dried up milk enzymes. It this method doesn’t work, I have also made a water and Rinza cleaning agent mixture in the Latte-go cup, again replacing milk in the cup with this mixture, and again no coffee grounds. Run this cleaning agent through a fake Latte process and that should clean out the channel. So same as previous method but also using Rinza cleaning agent along with the water. Rinza is especially made to clean milk enzymes in coffee making equipment, buy it on Amazon.
If cleaning the Latte-go cup does not correct you milk froth issues, look to your milk. Our experience with producing milk froth in this machine has always been with whole milk only, we have not tried or used other milks, so I can only say that I have experienced this issue with whole milk, but I’m sure it will apply to other milks perhaps at other degrees. If you are getting large air bubbles in your milk froth and the Latte-go cup channel is clean, then its your milk. BUY NEW MILK. This is the shortcut to prevent just ripping your hair out. Just BUY NEW MILK. I have had 2 instances so far where my frothing issues have been directly caused by milk which I believe was not fresh enough or had some other defect which I could not analyze. Just switching to new milk from another source corrected the issue immediately.
I also had one occurrence in the past where I had frothing issues. Cleaning the Latte-go cup did not solve it. I think I tried replacing the milk in the Latte-go cup several times but it may have been from the same carton of milk, I am no longer sure. In that one instance of time, I reduced the coffee maker brewing temperature from its hottest 3 dot setting to its medium 2 dot setting (read the manual), and in that case it corrected the milk frothing issue immediately as well. In hindsight, I think that was most likely also caused by the milk and not the heat setting of the unit overall. Just throwing this out there as something which I did run across, but while the heat setting corrected the issue, I think now looking back with further experience, that the issue was really just the milk. I think reducing the temperature just sort of put a chemical reaction sort of band aid on some milk which just possibly wasn’t fresh enough – that’s my guess.
Just very recently had another frothing issue, large air bubbles. We had bought 2 half gallon cartons of whole organic milk with exact same expiration date at exact same time at exact same store, Aldies, which is where we buy 90% of our milk – all of the time. For whatever reason, the one half gallon was causing us frothing issues with large air bubbles. Switching to the second half gallon immediately cleared up the issue. Visually, I could see no difference between the 2 milks. So good example of just trying different milk instead of going to other cleaning extremes to try to correct the frothing issue.
Descaling the coffee maker. I don’t know if I am correct here and/or potentially harming my machine or not but here goes. About once a month, I deep clean my entire machine using Rinza agent and water instead of buying a Philips specific descaling solution. I have done this for 11 months now. I own the Rinza cleaning agent, I don’t own the Philips descaling solution, so I am making use of what I have which is cheaper and on hand. I remove the water filter from the water tank. I fill the tank with a solution made up of 3 ounces of Rinza agent to remaining parts of cold water. The tank is filled with this solution. I then make several styles of drink using the machine and this solution without its water filter. I select ground coffee and like with the Latte-go cleaning process, I simply neglect to put ground coffee into the unit tricking the coffee maker to make a drink without actually using coffee. I make drinks using this method until all of the solution is used up. Both frothy and non-frothy drinks. Then I rinse out the water container in the unit and just refill it with 100% water as usual, still with no filter in place. And I run that through the coffee maker, again making a wide variety of drinks minus the coffee. This rinses all traces of the Rinza solution out of the machine. I then replace the water filter back into the tank and I’m back in normal coffee making business. So far this has worked very well for me, no issues. Try this or not for yourself, just putting it out.
Final words of advice. Search you-tube for videos relating to brew group cleaning and maintenance. Much better and informative then the official Philips product videos.
David Becker –
My wife and I bought this machine about 2 years ago, and it has held up nicely over time. It’s proven to be a simple, reliable alternative to going out to buy coffees and lattes from coffee shops, which is perfect since we work from home pretty much all the time. We’ve got 3 adults in our house and on average drink 5-6 total cups per day, and we so far haven’t run into any major problems.
One issue I had at first was that the coffee wasn’t as strong as I was used to (I tend to like it pretty strong), but it’s still good coffee. You can make drinks stronger by adjusting how fine the grounds are with a little knob in the bean compartment at top, but I didn’t start messing with this until very recently. You can only adjust in small increments while the grinder is active to avoid damaging it.
This machine is good for guests who want to make and customize their own individual drinks, though there is a small learning curve for first-time users. Once they know how to use it, they often comment how cool it is, and some have said they’d like to get one too (if it weren’t so expensive).
Maintenance is fairly simple: You have to change the water filter every few months, rinse the easily removable “brew group” every week or two, and apply grease to it every couple months. The only problem I had was reinstalling the brew group for the first time (there’s a little yellow switch on the side that needs to be in the right position). There was also one time we didn’t change the water filter while the replacement light was flashing (it gave us plenty of notice; we just procrastinated too much), so we had to buy a special descaling fluid to clean it out before we could use it again.
Yes, the machine can get loud, but I haven’t met a coffee grinder or latte maker that was quiet. This machine’s noise level seems pretty standard to me.
There are a few little tricks to using and maintaining the machine so that you can get the most out of it, but so do most machines like this. Overall, I’d say it’s very easy to use and makes good drinks. The price is a bit high, and you also have to consider the added costs of buying whole-bean coffee and replacement water filters. But convenience like this often comes at a price, right? I would say it was worth it for us.
Hoarder –
Purchased this as a big splurge for our household for Christmas (randomly happened upon it being 30% off sometime in November so I added the 4 year warranty onto it and still saved a ton!). Purchased the Latte Go version (w/Americano setting). Packing was clever and nothing was missing or broken. It looks gorgeous on the counter. We replaced 2 machines with it and it saves so much space. We’ve been playing around with it for a few weeks. We have used every setting so far, w/ground beans and whole beans. Some things that I have noticed.
-Right out of the gate we adjusted to the max temp. It’s not lava hot like we usually prefer but it’s def hotter than the standard initial setting.
-We were having trouble getting the right grind size so we actually went into W-S store and asked an associate to demo their machine for us. The coffee they brewed was perfect, so they let me take the top off and take a pic of their grind setting so I could replicate it at home. The little indicator that shows you which grind size you have selected is a little nub on the inside wall of the area where the beans go, and the dial next to the little nub has settings 1 – 12. Their setting was 6. I changed ours and everything has been great since. I don’t know if this is how it comes out of the box since I had already changed ours. (Note, you’re not supposed to adjust it unless it’s actively grinding, according to the book, and you have to press down and turn. I didn’t know this and got a few extra clicks out of mine prob when I shouldn’t have attempted. Thought I broke it tbh but it’s been working fine. Just be careful!)
-Def invest in good beans. We’ve tried light, med, and dark espresso roast whole beans. We love flavored coffee but light brew flavored whole bean coffees just don’t have much flavor at all when brewed out of this machine. The taste is improved w/flavored pre-ground beans in the bypass chute for some reason. W-S recommended Illy whole bean Classico medium roast, so we got a can (readily avail at groceries, Target, etc) and we are really enjoying it (we are solid black coffee drinkers but these med roast beans w/flavored frothed creamer on top is such a nice treat). I think what we may do is keep these Illy beans in the top and by our normal flavored pre-ground stuff to use in the bypass chut.
-Speaking of ground beans, the bypass has been really hit or miss for me but it seems to work most of the time by loading the grounds in BEFORE pressing any setting buttons at all. The scoop size is perfect, you don’t need to overfill it or pour more in or they will just be wasted down in the beans collection bin. Keep the little door flap open to help the chute dry out, steam does get in there when you brew and the grounds can stick inside.
-(Also something that I found interesting. We were using a reusable k-cup in our old Keurig and I used the Philips scoop and filled it to compare the ground beans amount. One scoop filled the reusable k-cup to the top. So I find it interesting that I could brew a whole 16oz cup of coffee with the same amount of grounds in the keurig but in this machine anything over 6 is like water….? Prob has to do w/the pressure or something but i’m no coffee-scientist so we’ll move on. lol)
-The beans collection bin, yes it will always have some water in it. Our pucks started to be formed more solidly after week 2, but water will get in there anyway because of the rinse cycle. The empty light will turn on after a certain number of brews, not when it’s actually full. And since it’s not actually full you don’t really have to empty it, you can just pull the drawer out all the way and push it back in again and the light will reset.
-We were able to adjust the Espresso 1x setting to 2 oz without losing any flavor.
-Coffee 1x setting is preset to brew 6 oz. I tried to increase it and it maxed out at 8 oz but the coffee was basically cloudy water. Bumped it back down to 6 oz. We’ve given up on trying to increase the fluid volume on any other types of brews because it seems that where it is preset at max gives the best flavor. Just keep re-pressing the brews until your cup is as full as you want.
-Max cup height that will fit on the tray is 6 1/4″. (We have 2 stainless tumblers that fit perfectly and hold 16 oz, we just brew multiple times to fill them as high as we want).
-Latte go is great when I figured out the higher you fill it up, the thicker/frothier the product gets. I like a super thick whip but initially was trying not to waste milk so I was only filling it to the bottom line. It was just coming out steamed and was splattering everywhere. We’ve frothed organic 2% milk and Chobani dairy flavored creamer (whole strength and cut with half 2% milk, if that makes sense) and both work great.
-Hot water is dispensed from the little nub where the Latte Go attaches, and it seems to dispense about 10 oz (altho I haven’t measured specifically). I drink hot lemon water every am and it comes out piping hot. I love that it’s pure clean water too and doesn’t have coffee residue in it like it did coming out of the keurig.
-The unit cleans itself every time it turns off and every time you turn it on. Not much water comes out each time but we like to keep a cup underneath so we don’t have to empty the tray as often.
-I have been cleaning the machine weekly, by pulling the whole brew group out and rinsing it under water but what i’m surprised the most by is how much grounds is still everywhere inside the machine (prob from my failed attempts at using the ground coffee bypass chute lol) I really have to get in there and try to get all of the grounds out which is a pain. There are so many little crevices that the grounds find to hide in. I wish the unit would have come w/a little brush to help swipe them out.
Overall, we are pleased! It’s def more work than we expected to get the beverages where we want them but I expected that. It’s so fun to have the variety and save the counter space. I will update my review as I notice more things or if any issues arise but so far we really love it!
Sunny and Tony –
I purchased the Philips 3200 Lattego with an additional filter as part of Amazon Prime Day, so my review is directly tied to that discounted price.
I find that this machine is really worth the money. It makes excellent espresso and latte macchiatos. That is a given, but how does it handle milk alternatives. I feel like there isn’t much comment on this, and I think it is worth discussing.
Since realizing, after two decades of pain and suffering, that I am lactose intolerant, I switched from milk products to oat milk. I typically purchase Silk brand’s original oat milk, but I also buy their creamy version, and other brands of oat milk. This machine does a good job of heating and frothing the oat milk, however, because it is quite a bit thicker than milk, it uses less oat milk in the automated process. This doesn’t bother me too much, because I typically use the latte macchiato function twice in a row to fill my coffee mug. Yeah, it is a healthy amount of espresso in the drink, but that can be adjusted. It does work with oat milk, and I prefer it that way. I have not tried it with soy milk, almond milk (might be a good choice given how thin it is), cashew milk, or other milk alternatives.
I recently also thought I would try lactose-free Horizon organic milk, and it works as a normal milk product would. It froths a lot more than the oat milk does, so be prepared for a lot of foam. It tastes a lot like an espresso drink you would have at any coffee shop, other than Starbucks. Even using Starbucks espresso beans, it comes out slightly less perfect than they can do, but over significant use, it surely pays for itself and it is still darn delicious.
One tip to mention is that when using pre-ground beans, make sure to close the lid after you load in one scoop. Don’t overfill it and don’t load it too early. When wanting to use pre-ground coffee beans, make sure to power up the machine and let it do the cleaning cycle first, before loading in the grounds. My machine doesn’t seem to do the pre-ground stuff as well as I’d like, and it has to do with the process. I am not sure why, but it will sometimes take two or three tries to get the machine to make it correctly, but once it does the first time, you can repeat the process in the same power cycle without issue. Load one scoop of grounds, close the lid, choose the drink, let the machine work. When it is done and you can select a new drink, repeat the process of loading the grounds, closing the lid, then choosing the drink.
I’m not entirely sure I would buy this machine at full price, but if you see it on sale, it is a great deal. I think the regular price of this one versus a higher end one from Philips is only $100 or so in difference, and the higher end models, 4300, 5400, etc., offer more options. That can be important for some. On sale, with the milk carafe, it is a bargain and worth it for the first super-automatic espresso machine. I think the price to consider picking it up if money is an issue is the $650 or so price point. Amazon Prime Day’s deal was less than. Highly recommended.
Made in Romania
UPDATE: I have been using this espresso maker for some time now, and I still think it is a great buy, especially on sale. Everything has held up great since purchase. I thought it might be good to leave some additional thoughts. First, the issue when using ground coffee seems to be less so. I have only experienced issues with it twice since my last review. Second, the one new negative thing I have found is that it can be a little noisy when in use. That doesn’t stop me from recommending it, but if you need something super quiet, this might not be the one you want. And finally, don’t forget to clean out the cavity where the used grounds fall out of. I never thought to clean it and one day my wife noticed some mold smell coming from that area and I had to stick my hand in and clean it out as best I could. I use it daily and I clean that part about once a month, and that seems to be good for me, but also note that I live in the dryest region in the United States, so we don’t really have humidity to make the problem worse. That’s all. I still highly recommend it, especially when on sale!
mel laytner –
S. Robinson –
I purchased this machine in May, 2022, and thought I’d wait on submitting a review until there had been time enough to see whether it would make a reasonable return on investment. I’m pleased to share the fact that, for me, this was a great buy. My assessment is based upon the fact that 1) the machine has lasted 18 months and is still going strong; 2) it’s paid for itself several times over based upon the coffee consumption habits in my household; and 3) it makes a very good mocha or latte style coffee, easily as good or better than Starbucks, as far as I and my wife are concerned.
More specifically, in terms of cost/benefit, I’ll share that in our household, we drink about three 16 oz mocha or latte style coffees per day, on average (excessive, I know). The cost of buying this much coffee at Starbucks or the local coffee stand would be approximately $25/day, including tip. The machine cost about $699 at time of purchase, and we’ve run, by this measure, about $13,500 worth of coffee through the thing. Sounds crazy, but $25 x 550 days does in fact equal a ridiculous amount of money spent on coffee.
Plus, I think the frothing apparatus is ingenious: two pieces of plastic pressed together, which work quite well, certainly as well as a conventional wand frothing tool. Prior to buying the Phillips machine, we owned a Breville Oracle Touch Espresso Machine. The Breville is a large unit, fully automated, with all the bells and whistles. It costs about $3,000. We loved it for the two and a half years that it worked. Then it started leaking and we learned an important lesson about Breville products: you can’t get parts to fix Breville products locally. When I contacted Breville about the issue, I was told that I could pay them $500 and ship the machine back to them for repair (on my dime). They’d repair it, return it to me and provide a six month warranty. Yeah, I got a laugh out of warranty – real vote of confidence in their work. In any event, I decided to try the Phillips as a low-cost option and have really been pleased. Definitely an interesting compare and contrast with the Breville unit (which I do not recommend).
The Phillips machine does have a few quirks, and there are a couple of changes to the unit I’d love to see. For example, the water supply is limited and therefore requires frequent refills. Similarly, the drip tray is fairly small and fills up pretty quickly. Also, the machine occasionally displays a warning that the drip tray needs dumping when, in fact, it does not. In these instances, I pull the tray out and wait for the warning to switch to the ‘no tray alert’ warning and then reinsert the tray. This said, the Phillips unit is easy to clean and maintain, and it’s relatively small and light.
All in all, I highly recommend this product.
Leslie de Graaf <span class="a-icon a-profile-verified-badge"><span class="a-profile-verified-text"> –
Emy –
I’m a huge coffee lover, and I recently purchased the Philips 3200 Series Fully Automatic Espresso Machine. I’ve been using it for a few weeks now, and I’m really impressed with its performance and ease of use.
This machine makes delicious coffee drinks, from strong espresso to creamy lattes. The built-in grinder ensures fresh grounds for every cup, and the adjustable settings allow you to customize the strength and flavor to your liking. I was particularly impressed with the quality of the espresso – it’s bold and flavorful, without any bitterness.
The Philips 3200 is incredibly user-friendly. The intuitive touchscreen interface makes it easy to select your desired drink and adjust the settings. The machine also does a great job of automatically cleaning itself, which saves me a lot of time and effort.
OreoMoreo –